7.10.19

Pink Fir Apples


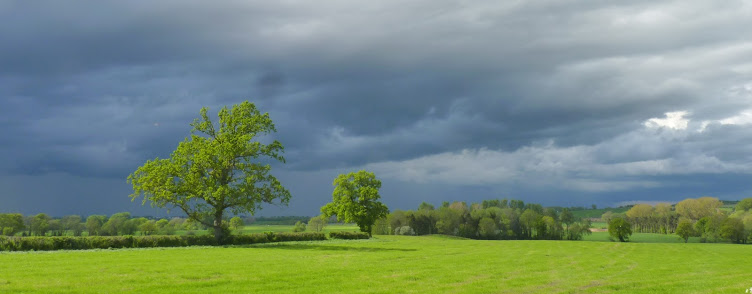
The field next door has been ploughed for the first time since I moved in, seven years ago. It's somewhat dramatic, but I do like a nice spread of tidy earth.

The time has come to sort the vegetable patch, depending on the weather of course.  One of the small crops of potatoes I planted in the Spring were Pink fir Apples. I first came across these many years ago in Waitrose (not my usual shopping habitat, but it is good for wandering round, window shopping).  They were rather expensive for my budget, but I bought some, as I liked the quirky shapes. They were quite delicious and I've tried growing them twice since, with limited success as they never grew to anything much.


However, I gave them another go this year and we had an initial dig in July. Again, I was disappointed with the size. Three plants gave us this amount of tubers, which when washed, looked alarming like baby rats. They were excellent though, steamed and buttered. 

Before I gave up on Pink fir Apples once and for all, I did a web search for tips. and discovered to my surprise, that they were not, as I had always presumed, 'earlies', (summer croppers) but one of the longest growing main crop potatoes, needing at least two months more in the ground before harvesting. So we left them. And waited.


Last night I took my big garden fork out into the dwindling light and began digging under the now-dead top growth. What a difference three months had made. I couldn't help but wish I'd done my research beforehand, as the first baby crop would have been so much more prolific had I left them to grow. However, lesson learned and something to aim for next year. 

I've had quite an interesting response to these on my Instagram account - they do still seem to be a rarity over here, though some people have tried and enjoyed them. An Argentinian follower told me that over there they are known as 'Papines' or loosely translated, 'little potato', so I'm guessing that they are a more exotic species in the UK than the traditional King Edwards, but well worth growing if you don't make my initial mistake and dig them up too before their prime.

4.10.19

Ewe Tree


After being flattened by what can only be called 'the first lurgy of winter', I finally got  round to finishing off a small artwork I began several weeks ago, 'Ewe Tree'. As you can see, it was inspired by one of my recent needle felted landscapes 'Shepherd's Cottage'. I recorded the initial stages on my Instagram account - this not only shares my work process with my followers, but also helps my flagging confidence when I get to the horrid mid-way stage.
 

I love layering barely tinted washes. They are left to dry naturally (no hair dryer short cuts). I keep an eye on each wash as it dries out, until I am sure I can safely leave it to finish off overnight, with no unintentional blotches. Then I put down the punchier colour work.


But to return to the horrid mid-way stage. This is when all the colour work is done and the whole thing has an fuzzy, unfinished look. Time to tighten it up with some minimal pencil work, which pulls the whole thing together. There is a trick to knowing when to stop, so that the lovely granulation and natural paint patterns can work their visual magic.


This piece was specifically designed for the round window mount that it comes with, but I have left the surrounding 'bleed' that you can see in the above picture, for alternative mounting. 'Ewe Tree' is, as I write, available for sale in the artworks section of my Etsy shop.   


Having achieved my first finished artwork of the year, I ordered some professionally printed Giclée art prints on lovely Hahnemühle Photo Rag Pearl 320gsm paper, as I know that not everyone can stretch to buying an original artwork. They are available with mounts in the prints section of my shop, with free UK shipping.

The prints are also presented in the same sized mount, but being slightly larger, the aperture size is bigger. Again, I have left the surrounding area underneath intact, as I am sure that not everyone is as obsessed with circular art as I am and may have their own idea about how they would like to view it. 

If they go well, I will be delving into my archives to have other artwork made into prints. And of course, picking up my paintbrushes again.


22.9.19

Lavender and summer's end


Summer is drawing to a close and with that comes the annual pruning of the lavender bush. It must be six years since I dumped it as a small sprigling  in a hollow wall brick, to take its chances and it has thrived. The bees turn it into a busy, humming factory and  continue to try to gather pollen even when the flowers are completely over. Which is why I leave pruning until the very end of the season.


This year I have pruned back harder than ever, in an effort to make it a little smaller and bushier. It now looks rather rugged and shorn, but there are tiny leaf nubs emerging. I cut right back to the tiniest ones, as near to the main stems as possible and remove as much deadwood as I can find. 
 
There has been a bumper harvest. Each year I bring it into the house to dry in a basket, and use it as natural kindling when we begin to use the wood burner. Every time I light the stems on a chilly winter's night, the smoke smells faintly of hot, herb scented summer days and I remember the sunny, buzzing sound of foraging bees.


28.8.19

White gold, green gold


It's been a funny season in the vegetable garden. Our weather has been very erratic, and some things have struggled. I planted two small crops of potatoes and we decided to investigate them at the weekend. One batch was planted as a pioneer, right at the end where the really poor soil was. I wasn't expecting much, but it is always exciting to shove a fork in, turn the earth and see what comes up.


At first it seemed as if there would be little or nothing, but two plants provided enough for dinner. They were rather misshapen and scabby, but a good scrubbing brought up the  yellowy skins and they were, in fact, delicious. 

  
My planting in the front patch has also been hit and miss; I envisaged a carefully landscaped herb patch with pretty little alpines spotted about. However, I planted dwarf comfrey. Wild comfrey grows quite large, so when I bought some 'dwarf' comfrey roots, I anticipated that they would be of a fairly modest size. 


This has not turned out exactly as planned; dwarf comfrey does, in fact, grow just as large as wild comfrey. It has grown into a many headed beast. My reason for cultivating it was purely practical; comfrey leaves (I have read) make excellent liquid fertiliser. The good news is that I have plenty of them and the plants thrive on being cut back. The bad news is that they are far too much of a thug to grow here and will have to be relocated to a wild patch, where they can flourish without drowning out their smaller neighbours. (Somewhere behind this lot are two lavender bushes and a curry plant). 


I harvested a fair amount. The leaves were torn into pieces and are now soaking in water, in a  not-very-picturesque plastic bucket. They rot down very quickly and produce an almost black, viscous liquid which frankly stinks to high Heaven. I'm going to need a bigger bucket. 


21.8.19

Mixing up green


My sketch books have many little hastily scrawled notes lurking in the back pages. They are my bank of ideas and often I have a plan in mind for them which I know may not be implemented for some time. For my first foray back into printing I chose this thumbnail of one of my cats, drawn in 2011. 

Mousie was a very slug like little creature and she was fluidly sprawled over a large cushion in deep sleep. At the time I knew that I'd want to turn this sketch into a two colour print, not knowing that it would take me eight years to realise this. 


Back in the present day, I re-drew the original sketch, adding more tail and took the artistic liberty of changing little browny-grey Mousie to a bright orange, which suited the sludgy green I wanted to use for the cushion. Then I cut two small, simple lino plates and backed them onto board to strengthen them.


I opened my tins of oil based printing ink with some trepidation, as they had been dormant for so long. They had acquired dried rubbery caps on top, but they were fine underneath. Could I still mix colour? Well yes, as it happens. To my surprise, I managed to achieve the understated green easily.


I had kept my home made registration block, despite nearly binning it a few years ago. I was glad I did; it's only made from thick board but is still useful.


I made several test pulls as the lino thirstily soaked up the ink and the first batch was quite patchy. I also needed the practice of smoothly inking up the plate. Eventually (and with some trepidation) I moved on to my newly purchased printing paper. It took most of the evening to produce the quantity I needed and by the time I had finished I had amassed  a considerable amount of green blobs.

Only some of these were up to scratch, which is fine. Some will do for the first test pulls of the next stage, the orange cat.


When they were dry, I sorted them into three piles - poor, passable and spot on. Now I need to move on to the second plate, which should be less nerve wracking, as I've learned from my mistakes and should be able to produce a small edition of good prints. I've only attempted multi-block printing once, many years ago when I was at college, so this will be interesting. 


18.8.19

Secret gardens and hidden darns


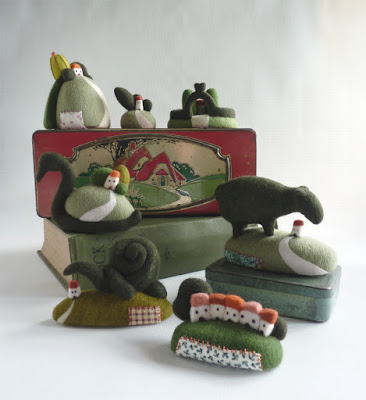
This summer I have found myself making miniature landscapes and oddly, they have become a form of self portrait. Not that I am a small green hump with vegetation growing on top, but the tiny houses often appear  difficult to get to, with minuscule windows implying a shy or sometimes alarmed expression.


The winding paths are one of my favourite motifs. You would have to walk up them to get to the house - and would there be anyone at home when you got there? Or are the occupants at home but not available to visitors?


I think, judging from feedback on my Facebook page and Instagram feed, that perception is everything with these pieces. The majority take them at face value; they are what they are. Sometimes people are a little alarmed at the proportionally 'giant' topiary figures. Others find them comforting. As for myself - I like the ambiguity.

'Creeper Cottage' is a case in point. The looming, topiary snail, could be seen as a threat to the house...or a gentle guardian.


I have also been adding extra surface elements, such as patches, as  visual puns. The patch on the front of  'Thimble Row' is deliberately clumsy, with over sized stitches and using a thick thread, as if a child had attempted their first mending project. I think the needle must have frightened the cottages, as they are leaning back and seem somewhat shocked.


'Halfpenny Hill' is similarly 'repaired'. In an actual garden, a bare grassy lawn area is re-seeded. Here, two very small visibly stitched fragments of cloth add interest to the plain hummock. One is hidden away at the back.  In life, we mend old clothes and much loved toys. In these worlds, the landscape is similarly refurbished.


'Swan Haven' is one of my more fanciful pieces; the topiary swan can never swim, but it carries an entire dwelling within a garden, as if it were a bizarre form of static barge.


The first garden I created earlier this year was the most secretive and difficult to photograph. This is entirely deliberate, as it is intended for the eventual owner to enjoy from a certain angle. My favourite view is simply head on, as if I were about to brave the long, straight path which leads to the tall, silent manor - protected (or guarded) by twin trees. Someone inside definitely knows you are coming.


'Shepherd's Cottage' is another patched and darned affair, with the sheep 'shepherding' the house - or possibly about to nibble it.


Many years ago, when I was an art student , I was taught that a good sculpture has points of interest from all views, so I delight in putting the darns in the least likely of places, where they will not at first be noticed.


The final landscape is the tiniest of all, designed to fit into a ring box. 


Behind the rather melancholy looking house, is  a neat,  incy-wincy darn in an unlikely shade of pink. This diminutive piece of felted real estate is now on a long journey to a new home, where I hope the owner will enjoy this snippet of 'the artist disguised as a house'. 


14.8.19

Making space for printing

  
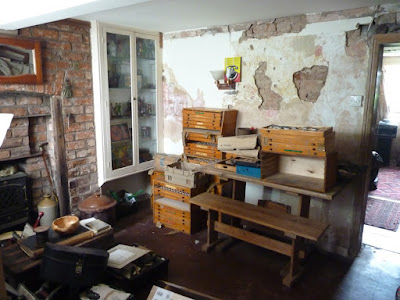
When Andy and I moved to the cottage in 2012, the front room became the 'storage area'. And it's stayed that way ever since, as I've simply not had the mental energy, interest or funds to do anything with it. It has improved over the years, but last month Joe and I decided to really tackle it.


In the end it was just  case of getting rid of the old futon base and various cardboard boxes and shifting the furniture around. 


The room still needs re-wiring, re-plastering, re-decorating and something doing to the very old, cold linoleum on the floor, but for the moment this will do.


My principal motive for all of this was to make a small work area, as I am finally in the right frame of mind to start printing again. I haven't printed since 2011, when Andy and I lived in our tiny rented Cotswold cottage. (See 'Printing Little Hare').

A few months later, we would have moved to Shropshire and soon after that my life would be in pieces. Now I feel able to start again, and carry on where I left off. However, my poor old printer, which spent a few  years in the damp top shed, was also in much need of some TLC.


Time to get out the magic 'Liquid Wrench'. This is marvelous stuff, but being an American product it is hard to find over here. (I buy mine from the only UK seller on eBay who stocks it) It is a fabulous de-ruster and lubricator and I wouldn't be without it.


It looked worse than it really was, and after an hour or so with a sanding pad, I had it looking nice again and rolling smoothly. The big old cupboard is perfect for storing print gear in, and is just the right height for me.


Brian-next-door helped to to hoick the (very heavy) cast iron press up into its new space and drove me out so that I could get some thick plates of glass cut for ink rolling.  And then I was all set up for printing again, having unearthed my box of inks and rollers. Now I just had to get over the hurdle of actually using it.